Monday, March 11, 2013

Raspberry Delight


Don't be deceived by this Delight.
Raspberry Delight
1 3-oz. package raspberry Jello
½ pint vanilla ice cream
1 10-oz. package frozen raspberries

Ad 1 cup boiling water to Jello and stir. Chill until firm. Add raspberries and ice cream and mix with blender or hand mixer. Chill for 45 minutes. Serve with cookies. Makes 6 servings.

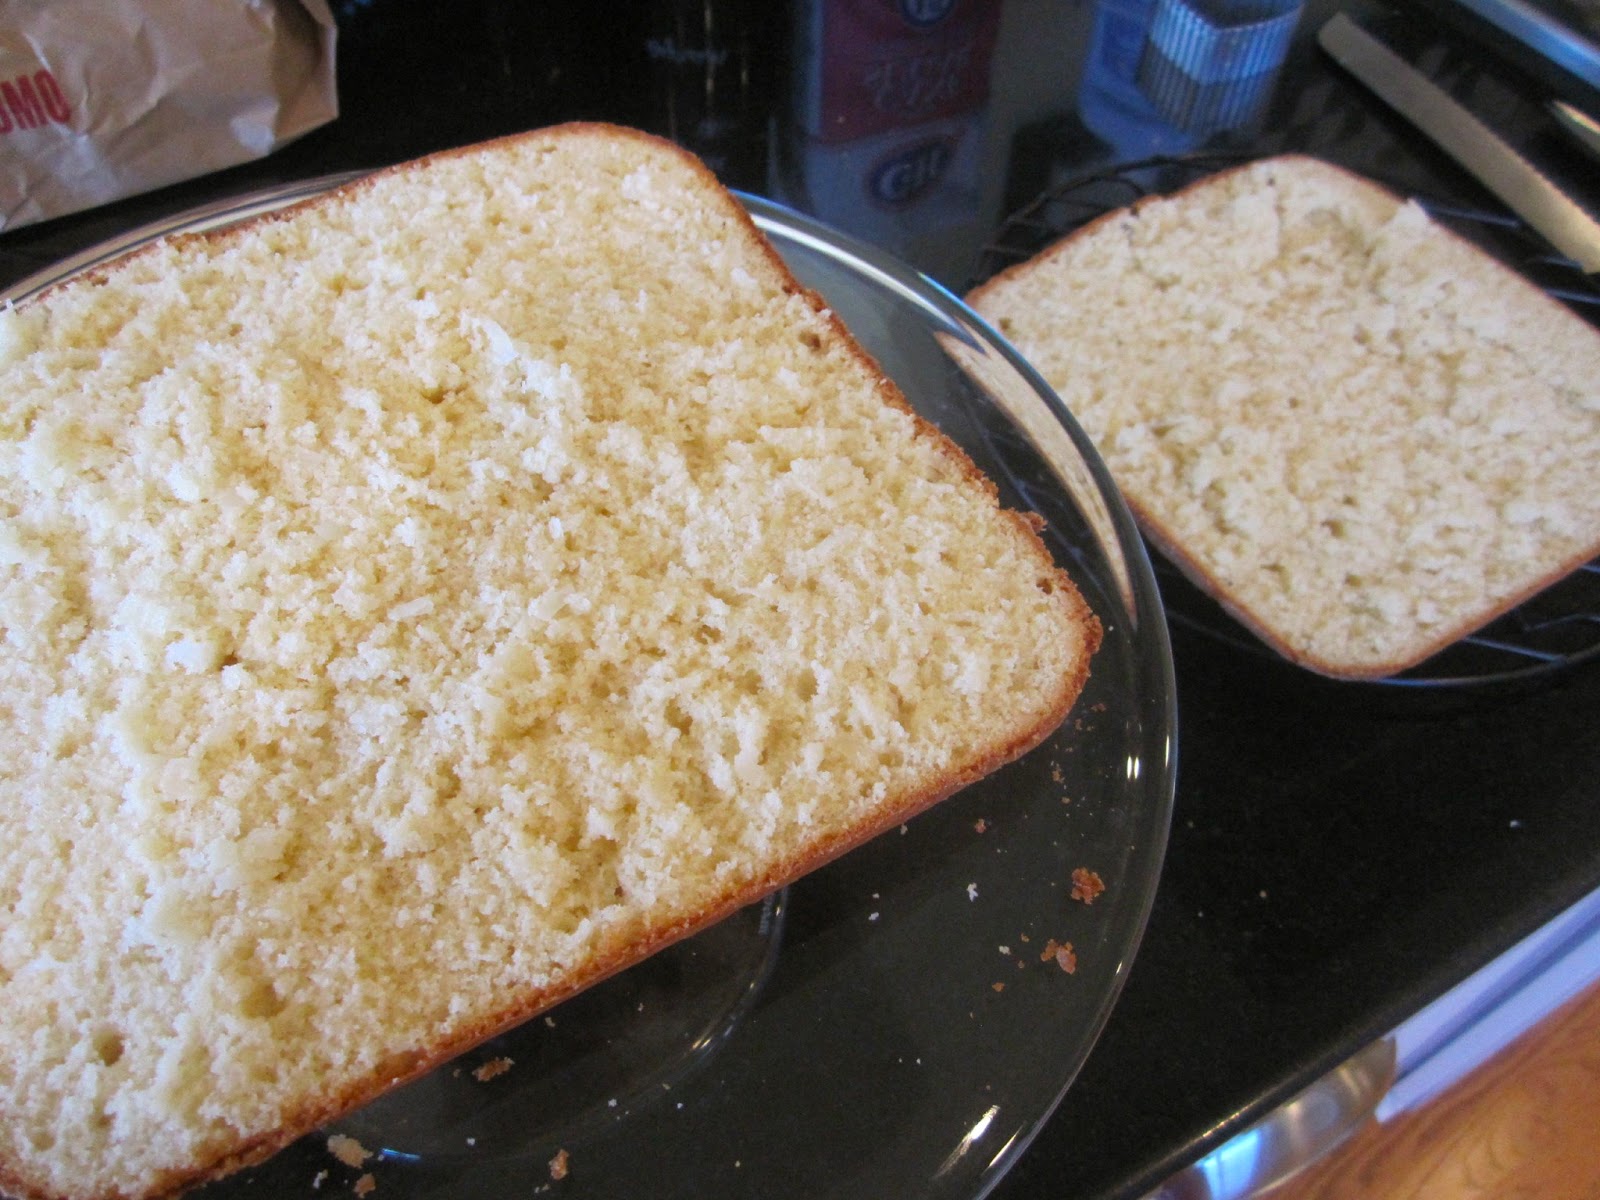
Faithful readers will remember I’ve long been intrigued with a packet of photocopied recipes that followed me home from preschool 30-some years ago. (See Peanut Butter Muffins.) I couldn’t get this particular enigma, Raspberry Delight, out of my mind. Woe to the recipe creator who names their concoction a “delight.” It’s so vague as to be deliciously tantalizing to yours truly. Is it a cake? A cookie? A pie? Who knows? Who cares? It’s a delight! And how could this one, with only three ingredients, be anything but?

Three ingredients shouldn't cause this much trouble.
I put the recipe and directions at the beginning of this post, so you would know up front what I was dealing with. With directions this vague, I guess we can only be thankful this same person isn’t writing code for the Mars lander. I mean the thing leaves me practically apoplectic with questions:

1)   What constitutes “firm”? Are we talking Jello that’s soft-set firm – the same consistency at which you’d stir in your bananas, say? Or a little more like Jello Jiggler firm? Or all the way, true-blue hospital Jello firm?
2)   Should I defrost my ice cream first or have a go with a solid brick of vanilla?
3)   Blender or hand mixer? I see varying degrees of splattered puree depending on which device I chose.
4)   Serve with cookies? Is this a dip? A smoothie? What kind of cookies would be best? After all, I only want to enhance my Delight.
5)   Is this really what constituted a healthy snack for a preschooler back in the ‘80s?

My trusty blender, defeated by Delight.
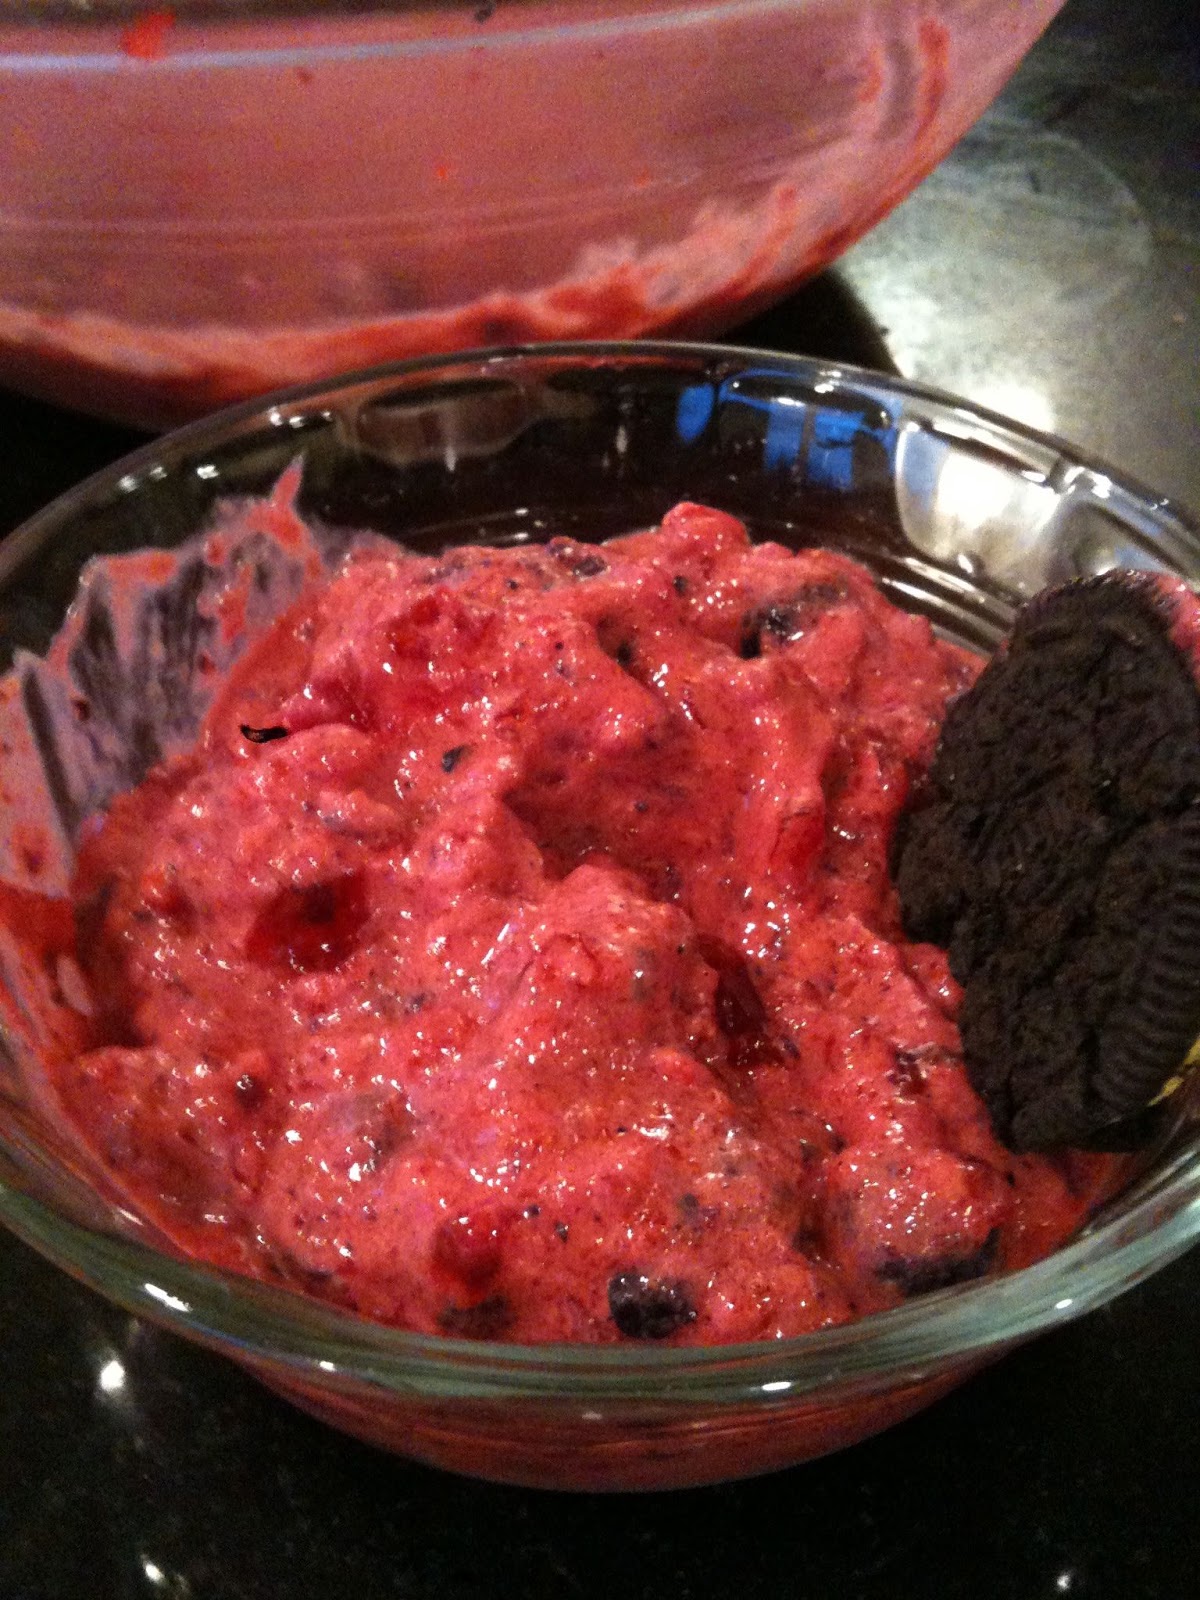
Not one to be outfoxed by a lack of directions, I set out with my adventurous zeal intact. I decided to take the recipe at face value. I let the Jello set up like I was making well, Jello. I did not defrost the ice cream or the berries. I used my blender. Correction: I tried to use my blender. As my husband tactfully put it: “You and I both know what happens when you try to blend something without liquid.” Well put, sweetie, but apparently the recipe developers at Everett Cooperative Preschool did not.  Before the poor blender’s motor actually started smoking, I turned the (kind of combined) mixture into a bowl and finished blending it by hand. Then I answered at least one question: This Delight was a dip. Sort of.

Really, it was more like a mushed-up Pudding in a Cloud, or Great Aunt Ethel’s’ Jello mold that sat out too long at the Easter buffet. But once I tasted it, I was left with only one question:
1)   Why?

Don’t get me wrong – it’s sweet and fluffy. But c’mon. This was a recipe developed for parents of preschoolers – already a pretty harried group of people who don’t have time to do battle with their blenders. You know what would be a real Delight? This cooperative preschool grad says take some prepared Jello, add a scoop of fresh berries and a smidge of ice cream. Now that's a delight done right!

Notes:
·      A half-pint of ice cream is about 1 cup for all of us metric-system flunkies. 
·      As you can see in the pictures, I used cherry Jello and mixed berries, both of which were on hand.
Delight with cookie -- I always follow directions!

Why Don’t You …
·      Give the original recipe a go with these modifications:
1) Don’t let the Jello set beyond the point you’d stir in fruit;
2) Defrost the berries;
3) Soften the ice cream;
4) Use the aforementioned hand mixer or stir by hand;
5) Serve with colorful wafer cookies or sugar cookies.

Wednesday, February 20, 2013

Peanut Butter Muffins

To continue the peanut butter theme this month, I now turn to a recipe booklet produced by the venerable Everett Cooperative Preschool, where yours truly got her academic start nigh these 35 years ago. It is hard to imagine a booklet less likely to come home with any school-aged child today. For one thing, there’s an entire section devoted to goodies made with peanut butter. For another, there’s the unselfconscious reliance on snacks made with corn syrup, margarine and canned biscuits – sometimes in the same recipe. (Rad.) But these “flaws,” coupled with the fact that the recipe booklet was clearly typed on a typewriter and is riddled with typos – both grammatical and cooking-related – make it pure Time Capsule fodder.

Lining the muffin tins is fun for all ages.
There are more than a few things wrong with these muffins, and I’ll get to that in a minute, but first, the thing that is totally right. Muffins really are a great thing to make with a preschooler. Fortunately, I have one, and he helped line the muffin tins, stir the dry ingredients and mix the wet and dry together, all the while adding little bon mots that make this age so great: “They’re going to love these Mom!” or “Oh, I can’t watch!” when I spilled some batter out the side of the tin.

And now, a few caveats. First, the recipe wants you to pour the hot melted margarine/peanut butter combo into the beaten eggs – which is a sure recipe for something, all right: Peanut butter scrambled eggs. Be sure to let this mixture cool down first.

The original recipe also fails to inform you when you should add the 2 T. of sugar. I chose to do so with the dry ingredients.


Do NOT add this hot mixture to your eggs!
Next, the recipe states to bake the muffins at 425-degrees for 25 minutes. I thought both the temperature and cooking time seemed excessive (and a quick look in my Better Homes & Gardens cookbook confirmed my suspicions) so I took it down by 25 degrees and 5 minutes (for standard-size muffins).  I’m glad I did, because they were nicely browned in 20 minutes.

Combining wet and dry.
I am willing to overlook a wide variety of eccentricities – in recipes and in life – if the payoff is worth it. In this case, it isn’t. The peanut butter taste is so faint as to be almost non-existent. In fact, if I didn’t know PB was the star ingredient, I would guess it was a browned butter muffin, and not in a good way.

This recipe harkens back to a time when it was okay to feed your kid bland, “safe” food. The irony being, of course, that peanut butter is on the top of many, many kids’ unsafe lists today.

It is always fun baking with my son. A while back, he coined the term “pupcakes” to describe cupcakes or muffins made in our mini-muffin tin. To hear him refer to these Peanut Butter Muffins in such a sweet way made trying this recipe worthwhile. But there are so many delicious and equally easy muffin recipes out in the world, I grant you a pass on these.


Peanut Butter Muffins (with original typos!)
2 c. sifted flour
2 Tablespoons sugar
1 Talbespoon baking powder
1/2 teaspoon salt
2 eggs
1/4 cup margarine
1/4 cup chunky style peanut butter
1 cup milk

Sift flour, baking powder and salt together into mixing bolw; make well in center. Beat eggs till foamy. Melt margarine and peanut butter in small saucepan; add to eggs; stir in milk. Pour into well in flour mixture; stir lightly and quickly, just till moistened. (Batter will be jumpy.) Pour into greased muffin tins, filling 2/3 full. Bake at 425-degree oven 25 minutes. Serve warm. Makes 10-12.


Notes:
·      The recipe does not specify, so I used skim milk. If you’re going to give these a go despite my warnings, I suggest trying something richer.
·      Bake standard muffins at 400-degrees for 20 minutes; check mini-muffins after 10.

"Mama" muffin and her "pupcakes."
Why Don’t You …
·      Stick around while I try more of these preschool recipes? I can’t wait to get to the inappropriately titled “Pizza Wackers,” and the unreal-sounding “Raspberry Delight” which features Jello and melted ice cream.

Saturday, February 2, 2013

Peanut Butter Chocolate Chip Cookies


A classic combination: Cookies & Milk!
My sister-in-law Jess is an enviable woman: beautiful, intelligent, kind and classy. She won my family over immediately, including my notoriously slow-to-warm daughter (now her biggest fan), with her easy-going charm. We were thrilled when she became my brother’s missus last year

Yes, to look at her she’s the total package. But then you’d learn, as we eventually did, of her one tragic flaw. You see, Jess cannot stand the mouthwatering, beloved, classic combination of peanut butter and chocolate.

Look at all these name brands!
I know. You’re thinking: “Throw her over!” Not like chocolate and peanut butter together? It’s downright un-American, isn’t it? Disturbing in the extreme.

Like in-laws the world over, I’m hoping to fix Jess. If the Time Capsule can cure me of my snobbery toward Cool Whip and margarine, surely it can help Jess overcome her dislike of one of the world’s great – dare I say ultimate – flavor duos. And so, in honor of her birthday later this month, I pay tribute to my sweet sister-in-law with these delicious cookies that any sane person without a nut allergy would be, well, nuts not to love.

You'll want to eat the batter at this stage ...
These Peanut Butter Chocolate Chip Cookies are included on a recipe card with eight other delights that I hope will soon make their Time Capsule debut. I’d date the insert to the mid-‘80s based on the package design of the featured ingredients, among them Nestle Toll House Morsels and Peter Pan Peanut Butter (peanutty!).

Easy and quick, these need little updating. Next time, I would add the entire package of chocolate chips and try not to eat as much of the batter. It’s dangerous, and now you’ve been warned. If you have more willpower than I do, you’ll discover a cookie bursting with peanut flavor and crunch, and ooey-gooey melted chocolate.

... and this one ...
Before posting this entry, I texted my brother one last time to confirm that things hadn’t changed since I saw them last at Christmas – Jess still disliked peanut butter and chocolate. He replied in the affirmative and added, “it is her most annoying trait!” But some things in life are more important than dessert. So if this remains Jess’s most annoying trait, than my brother is indeed a lucky man. He and Jess go together like, well, peanut butter and chocolate.

... and this one.
Peanut Butter Chocolate Chip Cookies

1-1/4 cup Gold Medal all-purpose flour
¾ measuring teaspoon baking soda
½ measuring teaspoon baking powder
¼ measuring teaspoon salt
¾ cup Peter Pan creamy peanut butter
½ cup butter, softened
½ cup sugar
½ cup firmly packed brown sugar
½ measuring teaspoon vanilla extract
5 measuring tablespoons milk
1 egg
One 6-ounce package (1 cup) Nestle Semi-Sweet Real Chocolate Morsels
½ cup chopped peanuts (optional)

Use an ice-cream scoop for portioning.
Notes:
·      I am loyal to Jif peanut butter, no matter what the recipe says. I am also loyal to real vanilla extract. No imitation here! (I’ll save that for the margarine and Cool Whip!)
·      I baked these on Silpats – those silicone baking sheet liners.
·      Don’t you agree it’s a little irresponsible of this recipe to insist on putting the word “measuring” before all of the smaller measurements, than totally disregard that emphasis when it comes to the larger quantities? Me too.

So delicious! Are you listening Jess?!?
Why Don’t You …
·      Use crunchy peanut butter and save a step?
·      Enjoy these while enjoying another classic combination: Cagney & Lacey? Mulder & Scully? Tango & Cash?

Sunday, January 20, 2013

Coconut Mist Cake


Hello gorgeous!
Oh, lovely Coconut Mist Cake, how did I miss you? Tucked away in a tiny recipe booklet dating to 1985 and extravagantly titled "Collection of Riches: An Indulgence of Recipes for Chocolate and Coconut Lovers," I've somehow overlooked Coconut Mist for far too long. The booklet, produced by the fine folks at Baker’s (of the German Chocolate and Coconut fame), does indeed provide an embarrassment of culinary riches within its frail pages. And first up is this gorgeous winner.

My mom single-parented my brother and I, and one of our favorite excursions was to the local grocery on a Friday night. Exhausted after a week working one of her three jobs, Mom let us choose our own adventure for dinner, with the results usually including the (then new) Tim’s Cascade Potato Chips and the (sadly, now defunct) San Francisco Seltzer, raspberry flavor. And on a really glorious, throw-caution-to-the-wind night, Mom led us over to the frozen-foods aisle and let us chose a dessert.
Creamed butter with wet and dry ingredients.

For those not familiar with the desserts that reside in the frozen-foods aisle, we will now observe a moment of silence. In the ‘80s, Pepperidge Farm dominated the aisle with jelly rolls, cinnamon rolls, and, my personal favorite: The coconut cake. When it was my turn to chose a sweet frozen treat, I went for it every time (even over its chocolate sibling). A small but sophisticated white cake covered in white frosting and sprinkled generously with coconut, this was my childhood version of heaven.

Hot out of the oven: A golden brown beauty.
The idea of any frozen cake is, of course, that you will take the time to defrost the treat in a manner keeping with the genteel nature of your upcoming gathering. Please. There is almost nothing better than a Pepperidge Farm coconut cake eaten straight out of the box, only semi-defrosted. Is anyone who buys frozen desserts really thinking ahead? If you’re thinking ahead, you have time to make homemade. No, I think the frozen-dessert aisle exists for midnight bingers and breakups, which, in my book, doesn’t make the goodies found there any less delicious.

Split the cake into two layers with a serrated knife.
I was pleased to see the Pepperidge Farm version still on offer today at my local store. But with the discovery of this Coconut Mist Cake, I also know I’ll not soon need to purchase it. This homemade lovely is studded with coconut at every turn – in the simple batter, in the luscious jam filling and finally, atop the fluffy Cool Whip frosting. It’s the kind of cake you can easily conjure up on a moment’s notice, not needing to fall back on a run to the frozen-foods aisle. Unless it’s midnight and you have a broken heart. In which case, Godspeed my dear reader. Godspeed.

Yes, this filling is good enough to eat with a spoon.
Coconut Mist Cake

1-1/4 cups all-purpose flour
¾ cup sugar
1-1/2 tsp. Calumet baking powder
½ tsp. salt
¼ cup butter or margarine, at room temperature
½ cup milk
½ tsp. vanilla
1 egg
2-2/3 cups (about ) Baker’s Angel Flake coconut
2/3 cup raspberry jam or preserves
3-1/2 cups thawed Cool Whip whipped topping

With original recipe in background.
Mix flour, sugar, baking powder, and salt. Cream butter to soften. Add flour mixture, milk and vanilla. Mix until all flour is moistened, then beat 2 minutes at medium speed of electric mixer, scraping bowl occasionally. Add egg; beat 1 minute longer. Stir in 2/3 cup of the coconut. Pour into 8x8x2-inch pan which has been greased and floured. Bake at 350-degrees for about 40 minutes, or until cake tester inserted in center comes out clean. Cool in pan 30 minutes; remove from pan and finish cooling on rack.

Split cake into 2 layers. Reserve 1 tablespoon jam for garnish; mix remaining jam with 2/3 cup of the coconut and spread between layers. Cover top and sides of cake with whipped topping and remaining coconut. Garnish with reserved jam.


Beautiful inside and out!
Notes:
·      Like my heart garnish? Yeah, me too. Perfect for Valentine’s Day! Just fill a cookie cutter with jam, let set for a minute and remove.
·      I’d recently been gifted a jar of homemade blackberry jam, which was just destined to be used in the filling. I think the called-for raspberry jam would be divine, as would cherry or apricot jam, or lemon curd or even orange marmalade.
·      I used a serrated knife to cut through the cake layers. Make sure the cake is completely cool.
·      Once frosted, I threw the whole thing in the refrigerator for a few hours. There is almost nothing better in my book than a good, dense, cold piece of cake. Plus, chilling it allowed the Cool Whip to really sink into the cake.

Delicious, and no heartache required.
Why Don’t You …
·      Try this with real whipped cream frosting?
·      Make a several-layer version for a larger gathering?
·      Take a pass through the frozen-foods aisle next time you need a quickie dessert or a full-fledged binge? No thawing necessary!

Sunday, January 6, 2013

Popcorn Cake


Kiss your New Year's diet resolutions goodbye.
My friend Lydia sent me this sweet email after New Year’s:

I was going thru my Mom’s recipe box over the holidays and came across a recipe I wrote up during the ‘80s. It made me think of you: Popcorn Cake! Basically it's a popcorn ball recipe with M&Ms and peanuts added and smushed into a 9x13. If anything, it'd be an easy recipe to do w/the kids.

I shivered from head to toe. Because at the exact moment I was reading Lydia’s email, my own recipe for Popcorn Cake was sitting at my elbow, all ready to be put to use as the first recipe of 2013. Time Capsule kismet! And all the more reason to throw New Year’s resolutions to “eat healthier” to the wind and embark on a recipe at least two girls in the ‘80s were keen on.

And it’s not hard to see why. As Lydia aptly describes, Popcorn Cake really is a glorified popcorn ball. Our recipes are similar but not identical, which makes these “hand-me-down” recipes all the more fun to collect and compare. (She grew up in Southern California, so I can officially say Popcorn Cake was having a West Coast moment – at the very least.)

The air popper at work.
My recipe is vague in both measurement and directions, but no wonder because it’s hand-written by me, circa 1983. The misspellings prove I still had to face my fifth-grade nadir, Ms. Dee (see Cheese”bugar” Pie), but does provide a charming glimpse of my 8-year-old self, if I say so myself.

I have absolutely no recollection of ever eating this during my childhood, but it is full of childish ideas of gourmet: salted peanuts, M&Ms, marshmallows and, of course, the popcorn. It’s hard to remember today, when the microwave has made popcorn an every-day affair, but when I was a kid, it was an event to get out the popcorn popper.

Melting marshmallows ...
Toward that end, I air-popped nine cups of popcorn (about 1/3 c. of dry kernels) and tossed it with the peanuts and M&Ms. Melting the butter and oil and marshmallows on the stove, I was reminded of one of my very favorite no-bake yummies, the Rice Krispie treat. But as I looked at the big greasy pot of oozing marshmallows, I also started to question the authenticity of my hand-written records. This was going to be one oily popcorn ball! Perhaps my recipe should have stated, “1/2 cup butter or oil” instead of both?

Sure enough, pouring the melted marshmallow mixture over the popcorn resulted in a very moist concoction. And, because it was hot, it also caused the M&Ms to melt and add to the resultant goop – a nice trick, but one that further confirmed my suspicions that there was more than enough goo to go around.

The wet and dry ingredients meet, and melt.
Really, I’ll eat anything once (in case you haven’t noticed), and I was more than game to dive into a piece of Popcorn Cake. After letting it firm up for about an hour, I cut into the pan. I’m happy to report that Lydia and I weren’t far wrong whenever we stumbled upon our respective recipes during our formative years. Popcorn Cake is very moist (yes, next time I’ll just use butter or oil, but not both), but tastes like a cross between Cracker Jack, Rice Krispie Treat and popcorn ball. I’d like to think that is also cheaper and a wee bit healthier than a traditional Rice Krispie treat.

Popcorn Cake promises to trim down with less fat in 2013.
There’s no denying that my original recipe for Popcorn Cake could use a few tweaks. But it provided a great entrée to the new year, and a fun reminder that food can and does span the decades and the geography between us. Enjoy!

“My” Popcorn Cake (reprinted as originally hand-written)

Ingredients
-9c or more of cooked popcorn
-1c M&Ms
-1c salted Spanish peanuts

Instructions
1.     Mix (above) ingredients in large bowl
2.     Melt together ½ c buter or margarine, ½ c Sufflower oil, 1 pkg small marshmellows
3.     Beat mixture so it isn’t separated
4.     Pore marshmellows mix popcorn mix and push down into mold or or pan which is greased well.

The original hand-written recipe card. At the top right are my illustrations for popcorn, M&Ms and marshmallows.
Notes:
·      My grocery store had Spanish peanuts, but they weren’t salted. Since I was using plain popcorn, I went with roasted, salted peanuts, against the emphasis of my childhood self.
·      It is important to ensure the melted marshmallows and fat of your choosing are well combined. I found a wire whisk worked well (and added to my love of alliteration!).
·      Great tip from Lydia that I failed to follow : “Be sure to pick out the un-popped kernels. Want to avoid broken teeth.” I mean, is this woman wise or what?

Why Don’t You …
·      Experiment with other fats? My go-to Rice Krispie treat recipe uses ½ c. of peanut butter and just a few tablespoons of butter (in addition to the marshmallows), and I would love to try that here, too.

Lydia’s Popcorn Cake (featuring adult spelling)

Pour into a large bowl:
3/4 c popcorn kernels - popped. (I microwaved a bag, it's my 21st century addition)
6 oz Planters’ peanuts
8 oz (or more) M&Ms

Boil for 1 minute:
1 cup Karo syrup
1 tsp cream of tartar
1/3 cup sugar
1 tbsp butter    

Add 1 tsp baking soda. Stir. 

Pour over popcorn mixture, mix and pour into a buttered 9x13 pan.